
If you are an online entrepreneur or blogger or anyone hoping to have an online existence then you'll surely love owning a website. Do you want to know to create a website by yourself without the help of so called professionals? Then this post may be helpful to you to most extent. I stumbled upon some websites but found no where the complete guide to teach you to create a simple website by yourself in Nepal. Rather I found posts where you'll have to pay as much as fifty thousand rupees that too for just a year to some bloggers to set up your site.
See this: Complete Guide To Start a Blog From Scratch And Earn Money From it
I hope this post will help you to register a website by yourself without any professional help. I would like to make sure for you that it'll be more advantageous than paying others to set up your site.
This guide will help almost every beginner with little knowledge of web building or blogging. It will help you set up your site in minutes and at the end you'll have a working web site. If you still have queries at the end you can contact us or can drop your genuine queries in the comment section. This post will help you understand the things in a simplified and short way.

In this post we'll be explaining the procedure in three steps.
- First step will be choosing the platform to create your website. This is where your all content will be created and managed.
- Second step will be choosing the best web host and an attractive domain name for the site.
- Third and Final step will be configuring and publishing your website.
Step 1: Choosing the Platform
According to Wikipedia
"What is the platform of a website?A platform-enabled website is a website in which additional functionality can be seamlessly integrated by means of an external application programming interface (API). The platform should provide integration points. These integration points are places in the application where new functionality can be plugged in."
It is where your content will be created, managed and published as well. These can be some drag and drop platforms. But in this post as we are talking about a simple website for you, we'll be talking about the most widely used platform for blogging career.
The most widely used professional platform is WordPress and we'll be explaining about creating a site with WordPress in detail here.
WordPress:
WordPress is the choice of most of the online entrepreneurs as it is comparatively simple, easy to use and best for low and medium traffic websites. It can be the best choice for creating your first website as it doesn't require much technical knowledge to get started and creating and publishing your content.
Here are some additional point on why I'll recommend WordPress over other platforms:
- It is easy to install in any web hosting sites. Most of the web hosts have one click install for WordPress.
- It is a open source software and can be used by anyone. You don't have to pay to use this platform apart from some premium templates and plug ins.
- It is easy to use and the perfect choice for beginners. It'll later look professional with the premium templates and edits at the end when the site is ready.
- You have a full control over your blog.
- It is more search engine friendly, professional and a great choice if you want to make some money out of your site.
Blogger:
Blogger is a free publishing platform by google. It lets you create a free simple website for you and publish the articles. As you can see this blog is also hosted on blogger and you can create a article site like this with blogger.
Why choose blogger?
Blogger can be a great choice for you if you just want to create a article site like this blog. Here are some points on why will a recommend Blogger:
- It is a great choice if you don't want to pay for your hosting plans as your blogger won't require any web host to host your blog. It is hosted on blogger and you'll just have to pay for the domain name.
- It is more simple to use and you'll know how to create and publish content in minutes.
- You don't have the full control over your blog. I mean blogger can anytime delete your blog with or without informing you for not
- It will not be a great choice if you want to make money out of your site.
There are other platforms like Drupal, Joomla for you to create a website.But I strongly recommend you to go with WordPress platform. And in this post too we are explaining about creating a website with WordPress platform.
When you have made up your mind for the platform (In our case WordPress) let's move forward to next step.
Step 2: Choosing Hosting And Domain Name
Before choosing a domain name for your website make sure what the website is gonna about. This is what we call the niche of the website. Selecting a niche is the most crucial part of choosing the best domain name for the website. You'll have to make sure that you create a website in your interest area and choosing a best domain name for it. If you are interested in sports and want to create a website on sports then choose a short, sweet and meaningful and easy to remember domain name for the website.
You can register any domain name for your site that is not already registered by others. And you can choose from a wide list of domain name extensions for your domain name. The most popular top level domain names are .com, .org and .net . If you are creating a personal or a niche site then .com will be the best extension for you.
Make sure you don't use symbols and numbers in the domain name. Use a short, branding, easy to remember, easy to type, niche explaining domain name for your web site.
If you are thinking to get hosting from the web hosts I listed below then you'll not need to worry about the domain name as you'll get a free domain name along with their hosting.
In Nepal Merchantile Communications is providing is free domain name for the residing and non residing Nepali citizens. But you can't register the domain name as you like, the domain name must either include your name or the company's name you are registering the domain for. If you want more details on how to register a free .np domain name follow the post below:
Web Hosting:
Web hosting is an online service which will provide you space to host your website. It will decide how much traffic your website can bear and how much space you have to create your content in WordPress. I'll recommend the shared hosting for you as a first time webmaster. It is cheap as compared to other plans and will work best for first time webmasters. Later when your site grows you can upgrade to other plans as well.
Now here we have some choices to different web hosts. But I have selected the best web host for you.
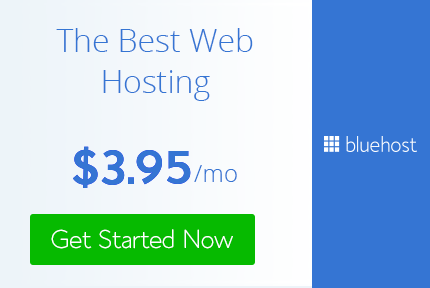
BlueHost:
BlueHost is one of the great choice for WordPress shared hosting. I would recommend you to use this as it provides one click WordPress Installation service and is one of the best hosting service in affordable price. If you buy the hosting from BlueHost then you'll get a free domain name as well. And I would recommend you to buy the hosting for longest period as it will be cheapest service for you.
If you want to buy hosting then go through the following link:
If you want to buy hosting then go through the following link:

DreamHost:
Dreamhost is yet another great choice for a beginner webmaster. It has affordable price for great services for a WordPress website. If you want a complete guide on how to register a WordPress site on DreamHost then follow the post below:
Siteground:
Siteground is yet another best web hosting site to start your new wordpress website. Its service is similar to that of Bluehost and DreamHost. Moreover it provides cheap hosting if you are planning to pay just for a year and not for a three year package.
You can follow this tutorial for WordPress Installation followed by domain name registration.
I'll suggest you to choose your hosting wisely. If you want to have cheap best hosting I'll suggest you to go with BlueHost .
If you want to buy the hosting then make sure you have an ATM card and the required money in it.
Now you've got the domain name and webhosting with WordPress installed in it now we're at the final step.
Step 3: Configuring the Site and creating content:
Now you've to configure your site and make sure to make some edits before publishing the site to the public. Configuring site in itself is a vast process. In this post we'll not describe about configuring your site. In the next post, we'll for sure teach you how to make configuration for your new website. Till then stay connected with us.
I try also try to compile the tips to make money online from your ready site on the next post.
If you have any queries then contact us and If you want to buy hosting please support us by buying hosting from our links above.
Thank you!!


0 comments:
Post a Comment
Please leave your valuable feedback here. Don't spam, stay safe...